Showing posts with label beading. Show all posts

Saturday, December 20, 2014

2014 Holiday Ornament Swap and Blog Hop

Wow!  I can't believe it's been four months since I've posted.  I'll give you a run down on what's been going on at a later time, though.  Today, it's all about the holiday ornament swap!

The ornament swap is organized by Sally Russick and is something I look forward to each year.

This year, I was excited to have Sally as my partner!  Sally is a master of many trades:  metal work, seed beading, photography.  Sally is also the mastermind behind the focus on life series that I participated in last year.

You can see that mastery in the ornament she sent.


It's so gorgeous!  I may or may not have squealed a bit when I opened the box.

I can imagine the hours of work that went into it.  It's too fabulous to pack away after the holidays, so I plan to keep in in my office all year long (next to Sandi's ornament from last year).

Thank you, Sally!  I am beyond grateful.

I also sent Sally a beaded ornament.  I beaded a bezel around a bead from Donna Millard.


I loved Donna's work and really wanted to do this bead justice.  My photo isn't the best.  I bet Sally takes a better one.

I also sent Sally a chain maille ornament.  It's a larger version of the Celtic Visions Star from Blue Buddha and was the December mailers choice kit.


Sally said Wyatt snapped it up.  I'm so glad he liked it!

Sally, thank you again and thank you for hosting this blog hop.

Please take some time and visit the other participants.  You will see some fabulous ornaments!

(To the other participants, I'm out of town this weekend, so I may not get hopping until this week, but I can't wait to visit everyone.)

1. Sally Russick and Tanya Goodwin (you are here)

Sunday, November 3, 2013

The story of four pendants from the Classic Bead

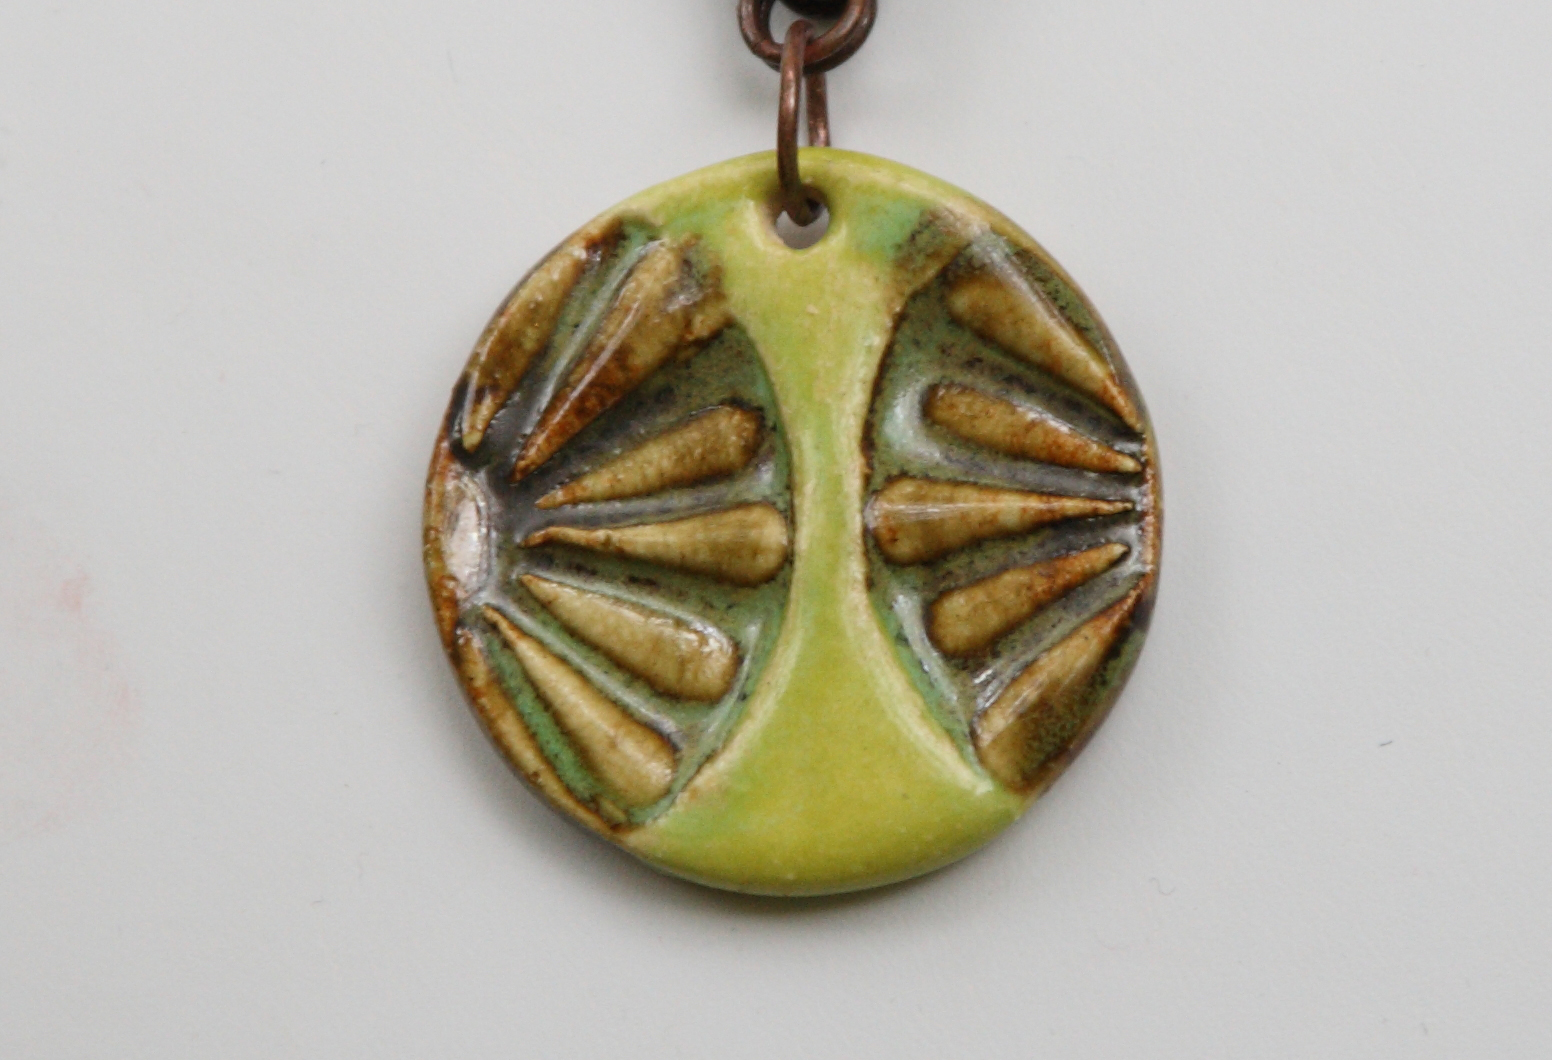
Lately, I've been playing with pendants made by Tracee Dock of the Classic Bead.

I've been a fan of Tracee's ever since I saw this necklace in the Spring 2010 issue of Stringing magazine.  Tracee's beads are gorgeous and I love her sense of style.

Recently, I was able to meet Tracee in person.  We met for brunch with Sharyl, then had a great time shopping at Harbor Freight and Joanne's.

Tracee brought some of her beads for show and tell.  Of course, Sharyl and I had to buy a few.  :)

As I added those beads to my stash, I realized I've been hoarding some of Tracee's pendants for a while.  I figured this was a good time for them to come out and play.

This was the first necklace I completed.


I used a cellini spiral for the center portion of the necklace (similar to this one) and used a bit of leather for the back of the necklace.


I made an s hook clasp that works perfectly with the leather.


The next necklace started after, inspired by my friend Sharyl, I played around with patinas and gilders paste.


I liked the result, but had a hard time incorporating it into a finished piece.  I looked through my beads and found this bumblebee pendant by Tracee.


It's a simple necklace, but I really like it.


Of course, I wondered how gilders paste worked on chain maille.

I adapted the center part of Kylie Jones's "Fluid" necklace, published in the October issue of Step by Step Wire Jewelry, and started adding patina and gilders paste.


I loved how it turned out and how it complimented this awesome pendant from Tracee.


This time, I added a bit of ribbon and beaded bands to hold the ribbon in place.  I also couldn't resist adding a beaded clasp.


Finally, I had the opportunity to play with an awesome disc/shallow cone bead Tracee made.  She showed it to Sharyl and me at brunch and mentioned that it had a tendency to fall forward, like many other types of disc beads.

This tutorial by Tanya McGuire immediately came to mind.  Tracee gifted me the bead and asked me to see what I could do.

Tanya's tutorial worked perfectly.

I painted a lucite leaf and added it to the back of the pendant.


I made another cellini spiral for the middle of the necklace and used an awesome chain I had been saving for a special occasion.


I adore how this turned out.


The beads I used are only a sampling of what Tracee has in her Classic Bead shop.

She's started adding holiday beads.  Take some time and look through her shop -- you won't be disappointed.

If you are looking for buttons or other clay creations, you can find them in Tracee's Classic Elements shop.

Friday, October 18, 2013

Seed Bead and Metal Blog Hop

Sharyl, from Sharyl's Jewelry and Shirley Moore, from Beads and Bread teamed up to offer a special blog hop.

Sharyl specializes in metal components, while Shirley does wonders with seed beads.  These ladies combined their pieces into a kit and invited their readers to play along.

Of course, I didn't think to take pictures when I received my components.

The beaded component I received was the "d" shaped one in the top left of Sharyl's photo.


The metal components I received were the dark copper circles in the top left of Sharyl's photo.


Sharyl also sent a clasp component that I'll show you below.

I'll be honest.  I had no idea what to do with these components.  I knew I wanted to use them all in one piece, but wasn't sure where to even start.

The copper circles were slightly domed.  I put them back to back and wondered if I could attach them somehow.  Then it hit me -- I could bezel them.


I chose colors that complimented Shirley's component.

The pendant is reversible.  Unfortunately, I didn't take full advantange and use different colors on the front and back.  I will next time, though. :)

After a while of staring at the pendant, I came up with the idea to connect it to Shirley's component.


The beads I used don't quite match, but it's hard to tell.

I *loved* the completed pendant and really wanted to showcase it, so I made a simple chain of half persian 4 in 1 to complete the necklace.


You may not be able to tell, but I changed the way the chain attaches.  In the close up above, the chain attached at the sides of the pendant.  In the photo above, it attaches at the middle.  I like the second way better.

I used the other of Sharyl's components as part of the clasp.  I created the hook on the right side and was able to slide it into the middle of Sharyl's component on the left.


I love the way this turned out and will be calling on Sharyl for more of her domed circles.  I can see several of these in the future.

Sharyl and Shirley, thank you so much for the components and the challenge.  I had fun and am so happy with how it turned out!

Please take some time to visit the rest of the participants.

Sharyl McMillian-Nelson -- Sharyl's Jewelry & Reflections (*Co-Host)
Shirley Moore -- Beads and Bread (*Co-Host) 
Candy Wham -- (Participant posting on Sharyl's blog
Angi Mullis -- (Participant posting on Sharyl's blog
Laren Dee Barton -- Laren Dee Designs
Beti Horvath -- Stringing Fool
Tanya Goodwin -- A Work in Progress - you are here
Marybeth Rich -- Forest of Jewels
Amy Severino -- AmyBeads
Carolyn's Creations -- Carolyn's Creations
Toltec Jewels -- Jewel School Friends

Wednesday, July 3, 2013

Spike Ring

I bought Maggie Roschyk's book, Artistic Seed Bead Jewelry , about a year ago and love it.  The projects in the book use seed beads to frame or bezel larger beads, making them shine.

When I saw Maggie's "Sovereign Spike Ring" in the October 2012 issue of Bead and Button, I thought, "it's such a cool ring, but I could never pull it off."

Luckily for me, a friend saw the ring and said "I would totally wear that all the time."

I started pulling beads out and came up with this.


I loved how the bezel came together and it is a great way to use up left over beads.

I love the ring, though, with the spike, I probably wouldn't wear it.  I would, however, substitute a 6mm or 8mm pearl .. or the new Czech gumdrop beads .. or the pyramid beads.  I think you get the picture.  :)

Saturday, May 25, 2013

What I've been doing

Wow .. it's been a while since I've posted.  I've even missed a few weeks of Sally's "Focus on Life" challenge.  (Don't worry.  I have one photo taken and will take the other this week.  I would like to get both posted this week.)

I wish I could say that I've been super busy and have a million things to show you.

Instead, I've been taking a bit of a break and working on one thing.

I've been totally inspired by Kate McKinnon's book, Contemporary Geometric Beadwork, Vol. 1.

I am just amazed at the shapes and forms and the design possibilities that spring from the book.  I recently pre-ordered Volume 2.  (Yes, volume one is that good and yes, there are that many more ideas).

I've been playing with Kate's pagoda bangle.


It's about one third complete.  I want to add a few more layers to the over skirt at the top and one or two more horns to the bottom.

I'll keep you posted on my progress.

To be truthful, I really want to finish this because I am dying to start on the Zig Zag Flower Kate posted a few days ago.

If you haven't seen Kate's book, definitely take a look.  You can order it here.

It's full of inspiring techniques and gorgeous photos.  I guarantee you'll want to start beading immediately.

Saturday, February 23, 2013

Freeform Peyote Challenge

A while ago, Karen Williams and Mandi Ainsworth put their heads together and challenged their readers to create something with freeform peyote.

I've only worked in freeform a few times, here and here, but I enjoyed it each time.  I was eager for the chance to try my hand again.

For this challenge, I dug out a mix of beads I had originally bought for this necklace.  I started stringing and realized I didn't have enough beads for a full necklace.  I continued, though, and improvised a bit.


I took the freeform strand and wove it through this awesome chain.


I made a freeform loop at either end of my beadwork and attached a toggle with a bit of "bling."


I finished the necklace with a length of velvet ribbon and a bit more "bling."


I'm a bit disappointed I wasn't able to do a full necklace, but I'm pleased with this.  It's a bit funky and formal and I can see myself wearing it with a t-shirt or with a little black dress.

If you want to try your hand at freeform peyote, you can find Karen's book, Freeform Peyote Beading, on Amazon.

Karen and Mandi, thank you for a fun challenge.

Please take time to visit the other participants and see what beady goodness they created.

Cohosts

Tanya Goodwin  -  you are here

Saturday, February 2, 2013

Inspire Change: Wellness Words Jewelry Challenge

At the beginning of a new year, some bloggers adopt a word to inspire them for the year.  (You can see my word here and here.)

This year, Tracy Statler from Make Bracelets! posed a jewelry challenge:  choose an inspiration word or phrase and make a piece of jewelry using that word/phrase.

My word for the year is "will."  I chose it to remind myself that I have the power to make my goals happen.

One of my goals this year is to move away from patterns and work with my own ideas.  This challenge was a great place to start.

I wanted to make something I could see -- a constant reminder of my goals. To that end, I decided on a ring.  I was inspired by the idea of spinner rings, rings which have an inside base and an outside layer which spins.

I started beading a quick peyote ring in my favorite color of seed beads.


Then I stamped my word on a length of copper sheet.  I textured and aged the copper and formed it around the peyote ring.


I decided against letting the copper spin because I had this great idea for the back of the ring.


I am so happy with how this came out.  The copper adds a definite weight to the ring that a typical beaded ring does not have.


Tracy, thank you so much for starting this challenge.  It was a blast.

Please check out all the other participants to see their inspirational jewelry.

pixiloo.blogspot.com - you are here 

Friday, January 11, 2013

Focusing on Life - 2 of 52

Last week, I wrote about my word for 2013.  I didn't mention that what I posted was an abbreviated version of what I originally wrote.

Luckily, Sally's second prompt for her focusing on life challenge is our "word" for 2013.  This means I get a chance to elaborate (and hopefully not bore you too much).

I don't like New Year resolutions.  By February or March, resolutions are forgotten.  I think this happens (for me, at least) because the desire to change doesn't always bring with it the will to act.


My word for 2013 is WILL.  Where there is a will, there is a way.

I think of an old boxer, down for the count, who wills himself up to continue the fight against the odds.  That's the kind of will I want for the year -- the will to keep fighting.  In my case, this is somewhat literal in that I will be sparring during my black belt test and it scares the hell out of me.


I envisioned an old photo: boxing gloves and handwraps tossed on the ground.  My sparring gloves are not all that close to boxing gloves, but that's okay because my belt isn't really a handwrap.  :)

The effect is similar, though, and I love the reminder it gives me.

Sally, thanks again for another fun photo week.  Please check Sally's blog, the Studio Sublime, and see how the other participants put their words for the year into photos.

Wednesday, January 2, 2013

My blogging review of 2012

I began blogging late in 2011.  2012, then, was my first full year blogging.

Throughout the year, I've tried to develop both my beading skills and my photography skills.

I spent a good part of 2012 participating in Lori Plyler's i heart macro series.  I was usually able to take pictures while playing/walking/running with the kiddo.  (Okay, she was doing the running.)  This post is a good example of me making use of my time while the kiddo was busy climbing, swinging, sliding and running around the playground.


My beading skills were put to the test by Karyn, from Releases by Rufydoof.  Karyn started Beading Babes group in 2011 and the group created some wonderful pieces in 2012.  It's hard to pick a favorite, but I love that I was able to use some African bronze beads to compliment Nancy Dale's Trellis necklace in project 4.  (If you want to try Nancy's pattern, it's available in her etsy shop.)


I received my 1st brown belt in karate and in kobujutsu in 2012.  (My black belt is looming around the corner -- 99 days, but who's counting?)


Around the time of our anniversary, my husband and I saw The Avengers, the *best* superhero movie to date.  (All hail Joss Whedon.)


I was able to convince my husband to take a few vacation days in 2012.  We traveled to Colorado for our first family vacation.


2012 was also the year the kiddo started kindergarten.  I can't believe how quickly she is growing up.


Throughout 2012, I participated in several beading challenges, my favorite of which was the 3rd annual Challenge of Color, hosted by Erin Prais-Hintz of Treasures Found and Brandi Hussey of Brandi Girl Blog.  (Erin's entry and permalinks to all the participants are here.)


I also spent the year following other bloggers.  I feel like I know Therese, Kim, Amy and Marla, to name a few, through their words and through their work.  I also found Sharyl's blog.  Sharyl and I were able to take advantage of our close proximity and spend a few afternoons watching the kiddo play.

I'm sure there are events I am forgetting, but these stand out to me.

My blog also had a good year.  According to google analytics, from January 1 - December 31, 2012, a whopping 7,007 people visited my blog a total of 10,695 times.  Of those visits, 3,688 (or 34.48%) were from returning guests.

Those 7,007 people viewed a total of 20,398 pages.

In 2012, I wrote 91 posts and received 793 comments (thank you all!).

While most of my blog traffic originated from google searches, a few referring sites stood out:
  • many people found my blog thanks to Lori's i heart macro series on her blog, Studio Waterstone
  • my love for challenges helped generate visits from Lorelei Eurto's blog and from Erin Prais-Hintz's blog, Treasures Found
  • several people visited after seeing this post from Beading Daily 
  • this post from Sharyl's Jewelry has brought many new visitors to my blog throughout the year (thank you, Sharyl)

This was my most popular post in 2012, though it was written in 2011. (Wow .. my photography has improved since then.)

I would like to thank everyone who has visited, commented on and followed my blog in 2012.  Every page hit and every comment means the world to me.

I hope everyone has a wonderful 2013.

Sunday, December 9, 2012

Beading Babes project 7

It's time again for our Beading Babes reveal.

This time around, instead of selecting projects for us, Karyn asked our Facebook group for ideas.  Collectively, we chose four projects.

The first project was "Enchanted Rivoli Earrings," designed by Csilla Csirmaz and published in the August 2012 issue of Beadwork Magazine.


I really enjoyed this project.  The earrings are comprised of a bezeled rivoli and a strip of herringbone rope.

The pattern called for several different sizes of seed beads so that the herringbone rope slowly increases in size.  I didn't have the size 9 seed beads called for, so I improvised.


I adore how they turned out.

Next was "Roller Beads," designed by Cathy Lampole and published in the October 2012 issue of Bead and Button.

I was pleased to see Cathy's name.  I love Cathy's shop and highly recommend her patterns.  Please take some time to check it out.

I was impressed by the finished roller bead.  The base is made from 4mm and 3mm pearls and embellished with crystals.  It looks great from the side or from the front.


I decided to something a bit different with these.  I made a metal wire frame and hung the bead from it.  I love my roller bead earrings.


Our third project was also published in the October 2012 issue of Bead and Button.  It is "Scalloped Pearls," designed by Angelle Procopio

I had a hard time deciding on a color scheme for this project.  I couldn't find bugle beads and pearls that I liked together.  Then Marcie Abney Carroll was kind enough to share the beads she used for the teal version of her picture frame pendant.  (This is a wonderful pattern, by the way.  I have it and highly recommend it and all of Marcie's patterns.)

I loved those teal bugles, so I started with those.  

I ended up improvising here as well.  I accidently ordered the 9mm bugles instead of 6 mm.  I also didn't have any cube  beads, so I used size 8 seed beads and 3mm crystals instead.


I tried to add a bronze clasp, but I didn't like how it attached to the bugle beads.  Instead, I created a small flower clasp which mimics the waves in the bracelet.


I used a snap closure which is hidden behind the flower.  I love how it came out.

Our last project was "Gothic Butterfly Bracelet," designed by Mikki Ferrugiaro and published in the December 2010 issue of Beadwork Magazine.

I had been wanting to make this bracelet since I saw it almost two years ago, but never got around to it.  Thankfully, Karyn gave me the "push" I needed.

Looking at this bracelet, I thought the wings were flat peyote and the connector strips were sewn on top.  That is not the case.  The wings (including the beginning of the connector strip) is one piece of peyote which folds up because of the different bead sizes.


I was also amazed that the wings are shaped pieces.  The wings don't droop or sag -- they sit perfectly on the top of your wrist.

Everything about this bracelet is stunning, from the focal, to the wings, to the straps.


I love how the top of the bracelet sits on your wrist easily.


Mikki has many more beautiful designs in her Artfire shop.  I highly suggest you take a look.

Karyn, thank you again for putting this together.  It was fun, as always.  I really enjoyed (finally) getting to a favorite project and finding a few new favorites.

Friday, November 2, 2012

Michaels Toast of the Town necklace hop

About a month ago, Erin Prais-Hintz of Treasure Found showed us her Toast of the Town necklace.  Erin made the necklace for Michaels as part of Michael's Made by Me, Inspired by Life promotion.

Erin's necklace is not only stunning, but is an amazingly versatile piece that can be worn several different ways.  I was immediately "wow"ed and started plotting my own version.  As it turned out, I didn't have to plot very long.

Erin, that wonderful challenge master, partnered with Michaels for a quick fire challenge.  Erin bought several strands of beads from Michaels and created three different color palettes.  She sent those sets of beads to a lucky few of us asking that we create our own version of her Toast of the Town necklace.

Erin sent each of us a random set of beads and I was excited to see I had received the brown and copper set -- I am totally an earthtones girl!


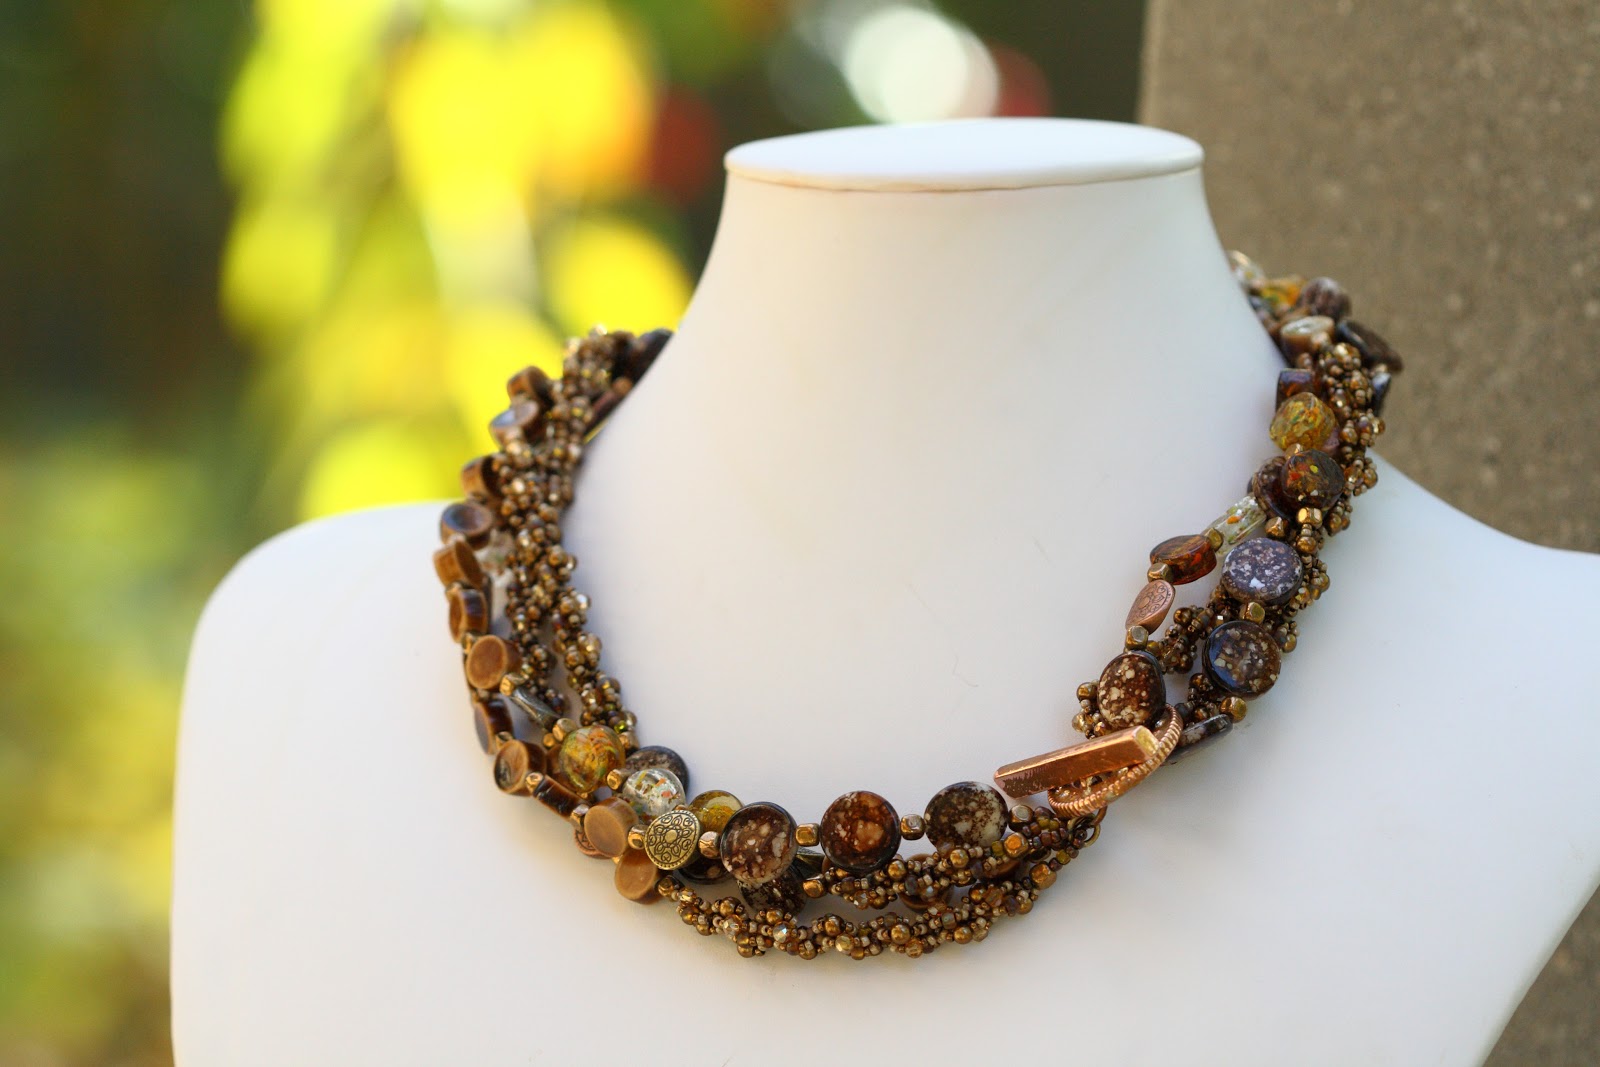
As luck would have it, I had a strand of bronze metal beads that worked perfectly with the beads Erin selected.  I started stringing .. and stringing .. and stringing.  Okay, it didn't take that long, but this necklace does take a ton of beads.


Two long (40 inch) strands of beads comprise Erin's necklace.  I was able to complete one strand using the beads Erin sent and even had a few left over.

I really wanted to incorporate bead weaving into this challenge.  Erin wanted to show how versatile her necklace pattern can be and I wanted to help her do that.

I looked through my stash and found a strand of 3mm bronze pearls.  A quick trip to the bead store yielded a strand of yellow/brown 3mm Chinese crystals.  What's a girl to do with those?  Make a spiral rope, of course.


I used the few beads I had left to break up sections of the spiral rope.

The spiral ropes compliment Erin's beads.


Erin was also kind enough to send a clasp.  It was a bit shiny for these beads, but a bit of gilder's paste helped toned it down.


I made my necklace a bit shorter than Erin's.  Even so, I was able to wear it twisted.


I think I prefer it hanging freely.  I love how you can adjust the strands to different lengths.


This necklace was so easy to make -- and fun also!  If you would like to make your own, you can find the instructions here on the Michaels website.

Erin, thank you for such a great design and a wonderful challenge.  I had a blast with these beads!

If you would like to see more awesome variations on the Toast of the Town necklace, please visit Erin's blog or take a look below:

Tanya - A Work In Progress - you are here
Pam - Re-Maker
Michelada - Micheladas Musings
Kay - Kayz Kreationz  (Note: Kay had to go out of town. Do check back for her reveal!)