I bought Maggie Roschyk's book, Artistic Seed Bead Jewelry , about a year ago and love it. The projects in the book use seed beads to frame or bezel larger beads, making them shine.
When I saw Maggie's "Sovereign Spike Ring" in the October 2012 issue of Bead and Button, I thought, "it's such a cool ring, but I could never pull it off."
Luckily for me, a friend saw the ring and said "I would totally wear that all the time."
I started pulling beads out and came up with this.
I loved how the bezel came together and it is a great way to use up left over beads.
I love the ring, though, with the spike, I probably wouldn't wear it. I would, however, substitute a 6mm or 8mm pearl .. or the new Czech gumdrop beads .. or the pyramid beads. I think you get the picture. :)
Showing posts with label ring. Show all posts
Wednesday, July 3, 2013
Thursday, June 13, 2013
Spinner Rings with Robyn Cornelius
I have wanted to do more metal work, so my first class at Bead and Button was with Robyn Cornelius. Robyn is a wonderful metal smith and I was very excited to take her "Spinner Rings" class.
Robyn make working with silver look so easy. You can tell she has years of experience under her belt. She was very helpful and guided the whole class in filing, texturing, sawing, soldering, polishing and folding.
We were all pleased with the end result.
Robyn paints the inside of her rings with liver of sulfur and achieves the amazing colors. I had never tried that before and will be playing a bit with the idea. You can see the colors change with each brushstroke.
While my attempt pales in comparison to Robyn's, I am pleased with the result.
You can see more of Robyn's work (and glimpse the gorgeous colors of her patinas) on her website.
You can also buy Robyn's tutorials from her etsy shop. Her waved bangle is next on my ever-growing list.
Robyn make working with silver look so easy. You can tell she has years of experience under her belt. She was very helpful and guided the whole class in filing, texturing, sawing, soldering, polishing and folding.
We were all pleased with the end result.
Robyn paints the inside of her rings with liver of sulfur and achieves the amazing colors. I had never tried that before and will be playing a bit with the idea. You can see the colors change with each brushstroke.
While my attempt pales in comparison to Robyn's, I am pleased with the result.
You can see more of Robyn's work (and glimpse the gorgeous colors of her patinas) on her website.
You can also buy Robyn's tutorials from her etsy shop. Her waved bangle is next on my ever-growing list.
Saturday, February 2, 2013
Inspire Change: Wellness Words Jewelry Challenge
At the beginning of a new year, some bloggers adopt a word to inspire them for the year. (You can see my word here and here.)
This year, Tracy Statler from Make Bracelets! posed a jewelry challenge: choose an inspiration word or phrase and make a piece of jewelry using that word/phrase.
My word for the year is "will." I chose it to remind myself that I have the power to make my goals happen.
One of my goals this year is to move away from patterns and work with my own ideas. This challenge was a great place to start.
I wanted to make something I could see -- a constant reminder of my goals. To that end, I decided on a ring. I was inspired by the idea of spinner rings, rings which have an inside base and an outside layer which spins.
I started beading a quick peyote ring in my favorite color of seed beads.
Then I stamped my word on a length of copper sheet. I textured and aged the copper and formed it around the peyote ring.
I decided against letting the copper spin because I had this great idea for the back of the ring.
I am so happy with how this came out. The copper adds a definite weight to the ring that a typical beaded ring does not have.
Tracy, thank you so much for starting this challenge. It was a blast.
Please check out all the other participants to see their inspirational jewelry.
This year, Tracy Statler from Make Bracelets! posed a jewelry challenge: choose an inspiration word or phrase and make a piece of jewelry using that word/phrase.
My word for the year is "will." I chose it to remind myself that I have the power to make my goals happen.
One of my goals this year is to move away from patterns and work with my own ideas. This challenge was a great place to start.
I wanted to make something I could see -- a constant reminder of my goals. To that end, I decided on a ring. I was inspired by the idea of spinner rings, rings which have an inside base and an outside layer which spins.
I started beading a quick peyote ring in my favorite color of seed beads.
Then I stamped my word on a length of copper sheet. I textured and aged the copper and formed it around the peyote ring.
I decided against letting the copper spin because I had this great idea for the back of the ring.
Please check out all the other participants to see their inspirational jewelry.
pixiloo.blogspot.com - you are here
Monday, June 4, 2012
Tiny Copper Rings
I love beading magazines .. and jewelry magazines ... and metal working magazines .. and wire magazines .. the list could go on and on. Even though I don't have the materials for all the projects, I still like to read about the process (and fantasize of an unlimited stash and budget).
Ttoday was a lazy Sunday. My husband and daughter were busy playing Plants vs. Zombies. I was paging through the June/July issue of Step by Step Wire Jewelry and saw "Love Knot" by Abbi Berta. She twisted thin gauge wire into a cute little ring.
Hmm .. the husband and kiddo were occupied. I had 20 gauge wire and a torch. That's all it took for me to run outside and try my hand at these:
The ring above is my attempt at Abbi's design.
The last two rings are the result of playing around with loops.
This was a fun project with almost instant gratification.
As a side note, Linda Larson's "Bronze Age Cuff" is also featured in the current issue of Step by Step Wire Jewelry. I adore Linda's tutorials and this cuff is amazing. One of these days, I'm going to get the nerve to try it. :)
Ttoday was a lazy Sunday. My husband and daughter were busy playing Plants vs. Zombies. I was paging through the June/July issue of Step by Step Wire Jewelry and saw "Love Knot" by Abbi Berta. She twisted thin gauge wire into a cute little ring.
Hmm .. the husband and kiddo were occupied. I had 20 gauge wire and a torch. That's all it took for me to run outside and try my hand at these:
The ring above is my attempt at Abbi's design.
The last two rings are the result of playing around with loops.
This was a fun project with almost instant gratification.
As a side note, Linda Larson's "Bronze Age Cuff" is also featured in the current issue of Step by Step Wire Jewelry. I adore Linda's tutorials and this cuff is amazing. One of these days, I'm going to get the nerve to try it. :)
Friday, March 16, 2012
A ring for the kiddo
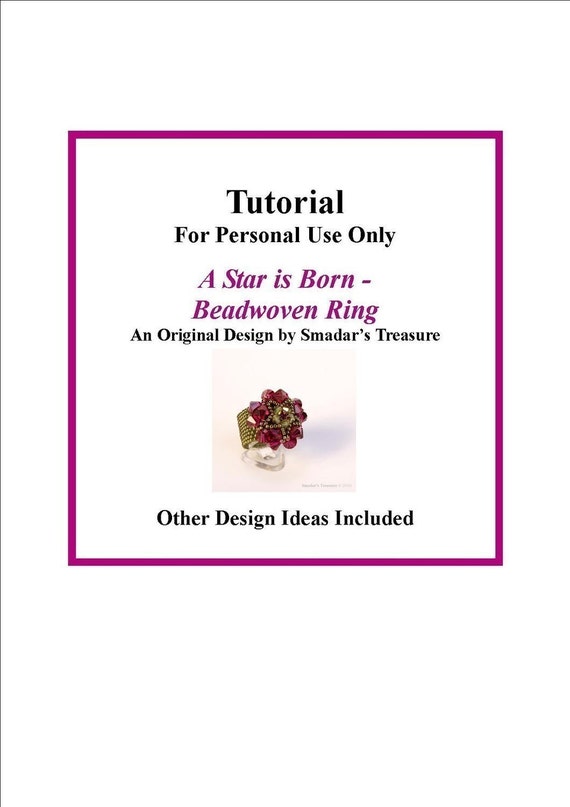
Some time ago, I bought this tutorial from Smadar's Treasure for a ring called, very appropriately, A Star is Born.
Much to my delight, the ring worked up quickly and easily. It also takes just a few beads, most of which I usually have laying around.
I think it's definitely pretty in pink.
Since I don't wear rings often, this sits in my jewelry box waiting for a special occasion.
I did not count on the fact that little girls love sparkles and have very good memories. Yesterday, the kiddo asked if she could wear my ring. It took me a few minutes before I realized she was talking about my pink sparkly ring. My rings are too big for her little fingers, so off we went to the bead store.
The kiddo has some amazing taste. The colors she chose are awesome together. I used slightly smaller beads for her ring and I love the way it turned out.
I might even make a smaller one for a pinky ring for me. :)
Check out Smadar's blog and etsy shop for more awesome tutorials.
Another of Smadar's patterns was used for this month's Beading Babes projects. We all took a stab at Smadar's Ravashing Rosettes pattern. You can see my version here. The other members' versions are here.
Much to my delight, the ring worked up quickly and easily. It also takes just a few beads, most of which I usually have laying around.
I think it's definitely pretty in pink.
Since I don't wear rings often, this sits in my jewelry box waiting for a special occasion.
I did not count on the fact that little girls love sparkles and have very good memories. Yesterday, the kiddo asked if she could wear my ring. It took me a few minutes before I realized she was talking about my pink sparkly ring. My rings are too big for her little fingers, so off we went to the bead store.
The kiddo has some amazing taste. The colors she chose are awesome together. I used slightly smaller beads for her ring and I love the way it turned out.
The smaller beads look great on her little fingers.
I might even make a smaller one for a pinky ring for me. :)
Check out Smadar's blog and etsy shop for more awesome tutorials.
Another of Smadar's patterns was used for this month's Beading Babes projects. We all took a stab at Smadar's Ravashing Rosettes pattern. You can see my version here. The other members' versions are here.
Subscribe to:
Posts (Atom)