Sunday, December 9, 2012

Beading Babes project 7

It's time again for our Beading Babes reveal.

This time around, instead of selecting projects for us, Karyn asked our Facebook group for ideas.  Collectively, we chose four projects.

The first project was "Enchanted Rivoli Earrings," designed by Csilla Csirmaz and published in the August 2012 issue of Beadwork Magazine.


I really enjoyed this project.  The earrings are comprised of a bezeled rivoli and a strip of herringbone rope.

The pattern called for several different sizes of seed beads so that the herringbone rope slowly increases in size.  I didn't have the size 9 seed beads called for, so I improvised.


I adore how they turned out.

Next was "Roller Beads," designed by Cathy Lampole and published in the October 2012 issue of Bead and Button.

I was pleased to see Cathy's name.  I love Cathy's shop and highly recommend her patterns.  Please take some time to check it out.

I was impressed by the finished roller bead.  The base is made from 4mm and 3mm pearls and embellished with crystals.  It looks great from the side or from the front.


I decided to something a bit different with these.  I made a metal wire frame and hung the bead from it.  I love my roller bead earrings.


Our third project was also published in the October 2012 issue of Bead and Button.  It is "Scalloped Pearls," designed by Angelle Procopio

I had a hard time deciding on a color scheme for this project.  I couldn't find bugle beads and pearls that I liked together.  Then Marcie Abney Carroll was kind enough to share the beads she used for the teal version of her picture frame pendant.  (This is a wonderful pattern, by the way.  I have it and highly recommend it and all of Marcie's patterns.)

I loved those teal bugles, so I started with those.  

I ended up improvising here as well.  I accidently ordered the 9mm bugles instead of 6 mm.  I also didn't have any cube  beads, so I used size 8 seed beads and 3mm crystals instead.


I tried to add a bronze clasp, but I didn't like how it attached to the bugle beads.  Instead, I created a small flower clasp which mimics the waves in the bracelet.


I used a snap closure which is hidden behind the flower.  I love how it came out.

Our last project was "Gothic Butterfly Bracelet," designed by Mikki Ferrugiaro and published in the December 2010 issue of Beadwork Magazine.

I had been wanting to make this bracelet since I saw it almost two years ago, but never got around to it.  Thankfully, Karyn gave me the "push" I needed.

Looking at this bracelet, I thought the wings were flat peyote and the connector strips were sewn on top.  That is not the case.  The wings (including the beginning of the connector strip) is one piece of peyote which folds up because of the different bead sizes.


I was also amazed that the wings are shaped pieces.  The wings don't droop or sag -- they sit perfectly on the top of your wrist.

Everything about this bracelet is stunning, from the focal, to the wings, to the straps.


I love how the top of the bracelet sits on your wrist easily.


Mikki has many more beautiful designs in her Artfire shop.  I highly suggest you take a look.

Karyn, thank you again for putting this together.  It was fun, as always.  I really enjoyed (finally) getting to a favorite project and finding a few new favorites.

Saturday, December 1, 2012

Floral Holiday Blog Hop

For my entry in the 3rd Annual Challenge of Color, click here.

Lisa Lodge, from A Grateful Artist, is known for creating wonderful bead soup mixes and hosting fun (and challenging) blog hops using those great mixes.

This time around, Lisa sent bead mixes with lucite flowers and leaves.  The mix I received contained beads and lucite in soft shades of blue and pink.


I started with the seed beads, the copper leaves and the white drops.  I paired those with clear/pink seed beads and a bit of chain from my stash.


I used the bright pink beads in one strand and ended all three strands with the white drops from Lisa's kit.


This rhinestone link from Michaels is perfect for the holidays.


The end piece is this lariat.


Next, I tackled the lucite pieces.  I mentioned above that the lucite flowers and leaves were light blue and pink, yet the picture showed metallic leaves and flowers.  What happened?

Well, as I looked at the beads in the mix, I kept stumbling with the "holiday" part of the challenge.  For me, "holiday" evokes images of silver and gold.  How to make the pinks and blues play well with metallics?

Then it hit me.  A few weeks prior, I had read this post by Sherri of Knot Just Macrame.  Sherri posted a tutorial for painting lucite flowers.  I thought I'd try her technique.  I didn't have any patinas, but I did have the kiddo's acrylic paints.

This is what I ended up with.


I thought the lucite flowers looked wonderful doubled up.  For the center of the flowers, I made two mini cuboctahedra from the Infinity Ubercube pattern by Gwen Fisher and Florence Turnour.  (You can find this pattern and many others on their website, Bead Infinitum.)


I bezeled the pink rounds from the kit  and made more flowers using Jean Power's "Crystal Flower" pattern from her book, Geometric Beadwork.  (If you are a seed beader, put this one on your Christmas list -- it's wonderful!)


I thought all the flowers looked wonderful together.


I attached the lucite and beaded flowers to a strand of silk cord and a beaded herring bone rope.


I made a quick S hook with copper wire and applied a bit of gilders paste.


Here is the finished necklace.


I was happy to see it turned out like I had imagined.

I was sad that the lucite leaves didn't make it into the necklace, so I decided to make a bracelet just for them.


I've always liked chain maille, but rarely take the time to weave anything.  I made a quick Byzantine weave bracelet using copper, silver and black rings.

I attached the lucite leaves here and there, along with the remaining pink beads from the kit and a few of the flowers I didn't paint.


I love my floral holiday charm bracelet!


So does the kiddo.  She loved modeling it for you.


Lisa, thank you for such a wonderful hop!

Please  take a few minutes and see what wonderful things the other participants did with their soups.

Courtney Breul, Beads by Breul
Jeannie Dukic, Jeannie's Blog
Kimberly Flood, Goddesses and Beads
Mary Govaars, MLH Jewelry Designs
Tanya Goodwin, A Work in Progress - you are here
Kathy Lindemer, Bay Moon Design
Alicia Marinache, All the Pretty Things
Toltec Jewels, Jewel School Friends

Friday, November 30, 2012

3rd Annual Challenge of Color

A few years ago, Erin Prais-Hintz from Treasures Found hosted the first Challenge of Color.  For this challenge, Erin picked palettes from paint chips.  The challenge proved to be popular and, a year later, Erin hosted the 2nd Annual Challenge of Color, this time using palettes from Jessica Colaluca's Design Seeds.

I was able to join in the 2nd Annual Challenge of Color.  (You can find my entry here.)  I had so much fun that when Erin announced the 3rd Annual Challenge of Color, I jumped right in.

This time around, Erin teamed with Brandi Hussey from Brandi Girl.  Together, Erin and Brandi selected 40 images from the Earth as Art image gallery.  Brandi, talented as she is, created color palettes from those images.

The Earth as Art images were taken by Landsat 7, a satellite designed to collect information about the Earth.  The Landsat 7 does not capture images in the same way we would see them.  Instead, the satellite takes a multispectral image, which records data across an electromagnetic spectrum.  In other words, Landsat 7 looks at light and radiation to see a different picture of the Earth, a picture that helps scientists understand more about our environment.

I had never seen Earth as Art before this challenge and I found myself spending hours browsing the galleries.   I highly suggest you take a look as well.  (Or, you can just hop around to see some beautiful images and jewelry created by my fellow challengers.)

Erin sent each person two palette and allowed us to choose which one we would like.  I couldn't help it.  I loved both images and opted for both.

This is the first image Erin sent to me:


The image is Campeche, a Mexican state comprised of rain forests and a bit of savanna.  Campeche is also the home of a many Mayan ruins.

The lush vegetation of the rain forests appear red on the image.  The savanna (I think) appears brown.

I love the red and turqoise together with just a hint of brown and green.  This is not a palette I normally work with, but I loved the image and I wanted a challenge.  As luck would have it, while browsing on etsy, I found the perfect focal bead from Atlantis Glass Beads.


It looks awesome with these glass beads.


I had brown leather that matched the brown in the palette.


My bracelet is inspired by Mary Jane Dodd's "Awakening Lotus" bracelet, which can be found in Bohemian Inspired Jewelry by Lorelei Eurto and Erin Siegel.  (By the way, if you haven't picked up this book yet, put it on your Christmas list -- it's fabulous.)

Mary Jane used waxed linen in her bracelet.  I didn't have any on hand, so I used seed beads.  I created a small spiral rope on either side of the coordinating beads.


On the other side, a peyote spiral highlights leather cording.


Of course, the turquoise is missing from my bracelet.  While I'm sad to have left out such a gorgeous color (and one that brings such beauty to the image), I love the darker green and brown with the dark blue.

This is my second image:


This picture is an Iraqi emplacement, an area, that according to Sky Image Lab, is "a former wetland that is now a staging area for military exercises."

I was taken with this palette when I first saw it.  I love purple and green together (who doesn't?), but it would not have occurred to me to add blue to the mix.

While at the bead store, I found the perfect Czech glass beads.  They have the perfect shades of purple and green and even a shimmer of light blue.  I decided to pair these with Swarovski crystals and bronze pearls.


I wanted to make a pendant worthy of this palette.  I immediately thought of Sabine Lippert's Granada pendant.  Luckily, I had everything I needed in my stash and it only took a short time to find the right colors.


Sabine is a gifted designer and beader.  The Granada pendant is available in Sabine's book, Beaded Fantasies.  You can also find wonderful designs in her website or etsy shop.

A spiral chain was the perfect compliment (and a good amount of "bling").


I *love* the finished piece.


Erin and Brandi, thank you so much for a wonderful challenge.  I love playing with color and these palettes were fabulous.

If you have time, please take a look to see what the rest of the participants did with their palettes.

Rebecca Anderson    http://songbeads.blogspot.com
Chrizette Bayman    http://beadsoupmix.blogspot.com
Lori Bowring Michaud    http://artfullyornamental.blogspot.com
Courtney Breul    http://beadsbybreul.blogspot.com/
Stephanie Buss    http://maxandlucie.blogspot.com
Cece Cormier    http://thebeadingyogini.com
Janice Everett    http://JLynnJewels.blogspot.com
Cherrie Fick    http://designsinthelight.co
Denielle Hagerman    http://somebeadsandotherthings.com
Karla Hartzog    http://www.karlakrafts.com
Kim Hora    http://www.kimmykats.com
Brandi Hussey    http://brandigirlblog.com
Sue Kennedy    http://suebeads.blogspot.com
Ema Kilroy    http://emakaye.blogspot.com
Linda Landig    http://www.LindasBeadBlog.com
Kirsi Luostarinen    http://kirsiluokorut.blogspot.com
Alicia Marinache    http://www.allprettythings.ca
Mary K McGraw    http://mkaymac.blogspot.com/
Karen Mitchell    http://www.overthemoon-design.com
Kashmira Patel    http://sadafulee.blogspot.com
Bobbie Rafferty    http://beadsong.blogspot.com
Nicole Rennell    http://nicolerennell.com/blog
Sally Russick    http://thestudiosublime.com
Annie Scherz    http://www.studioluma.ca
Renetha Stanziano    http://lamplightcrafts.blogspot.com
Melissa Trudinger    http://beadrecipes.wordpress.com
Shelley Graham Turner    http://www.shelleygrahamturner.blogspot.com
Rachel Van-Walsk    http://balancedcrafts.com/blog
Joan Williams    http://www.lilrubyjewelry.com

Saturday, November 17, 2012

i heart macro Sunday

Fall finally arrived.  The past few weeks have given us cooler temperatures and lovely shades of red, yellow and orange.


Most of the leaves have fallen from our trees, but a few are still hanging on.


For more macro goodness, check out Studio Waterstone

studio waterstone

Saturday, November 3, 2012

i heart macro Sunday

For my entry in the Toast of the Town necklace blog hop, click here.

The kiddo loves to keep me company while I take jewelry photos.  She chases the dogs in the yard, gathers flowers and is always willing to stand in "just the right spot" to cast an even shadow over my subject.

While I photographed my version of Erin Prais-Hintz's Toast of the Town necklace, the kiddo roamed the yard and collected stray leaves and flowers.

The kiddo is amazingly resourceful.  As I was busy snapping pictures, she entered the house and came out with a shot glass.


Carefully, she arranged her treasures.


She made sure each and every branch was in the exact right spot.


She is extremely proud of her bouquet.  She checks the water every day and, so far, it is still doing well.


For more macro goodness, check out Studio Waterstone

studio waterstone

Friday, November 2, 2012

Michaels Toast of the Town necklace hop

About a month ago, Erin Prais-Hintz of Treasure Found showed us her Toast of the Town necklace.  Erin made the necklace for Michaels as part of Michael's Made by Me, Inspired by Life promotion.

Erin's necklace is not only stunning, but is an amazingly versatile piece that can be worn several different ways.  I was immediately "wow"ed and started plotting my own version.  As it turned out, I didn't have to plot very long.

Erin, that wonderful challenge master, partnered with Michaels for a quick fire challenge.  Erin bought several strands of beads from Michaels and created three different color palettes.  She sent those sets of beads to a lucky few of us asking that we create our own version of her Toast of the Town necklace.

Erin sent each of us a random set of beads and I was excited to see I had received the brown and copper set -- I am totally an earthtones girl!


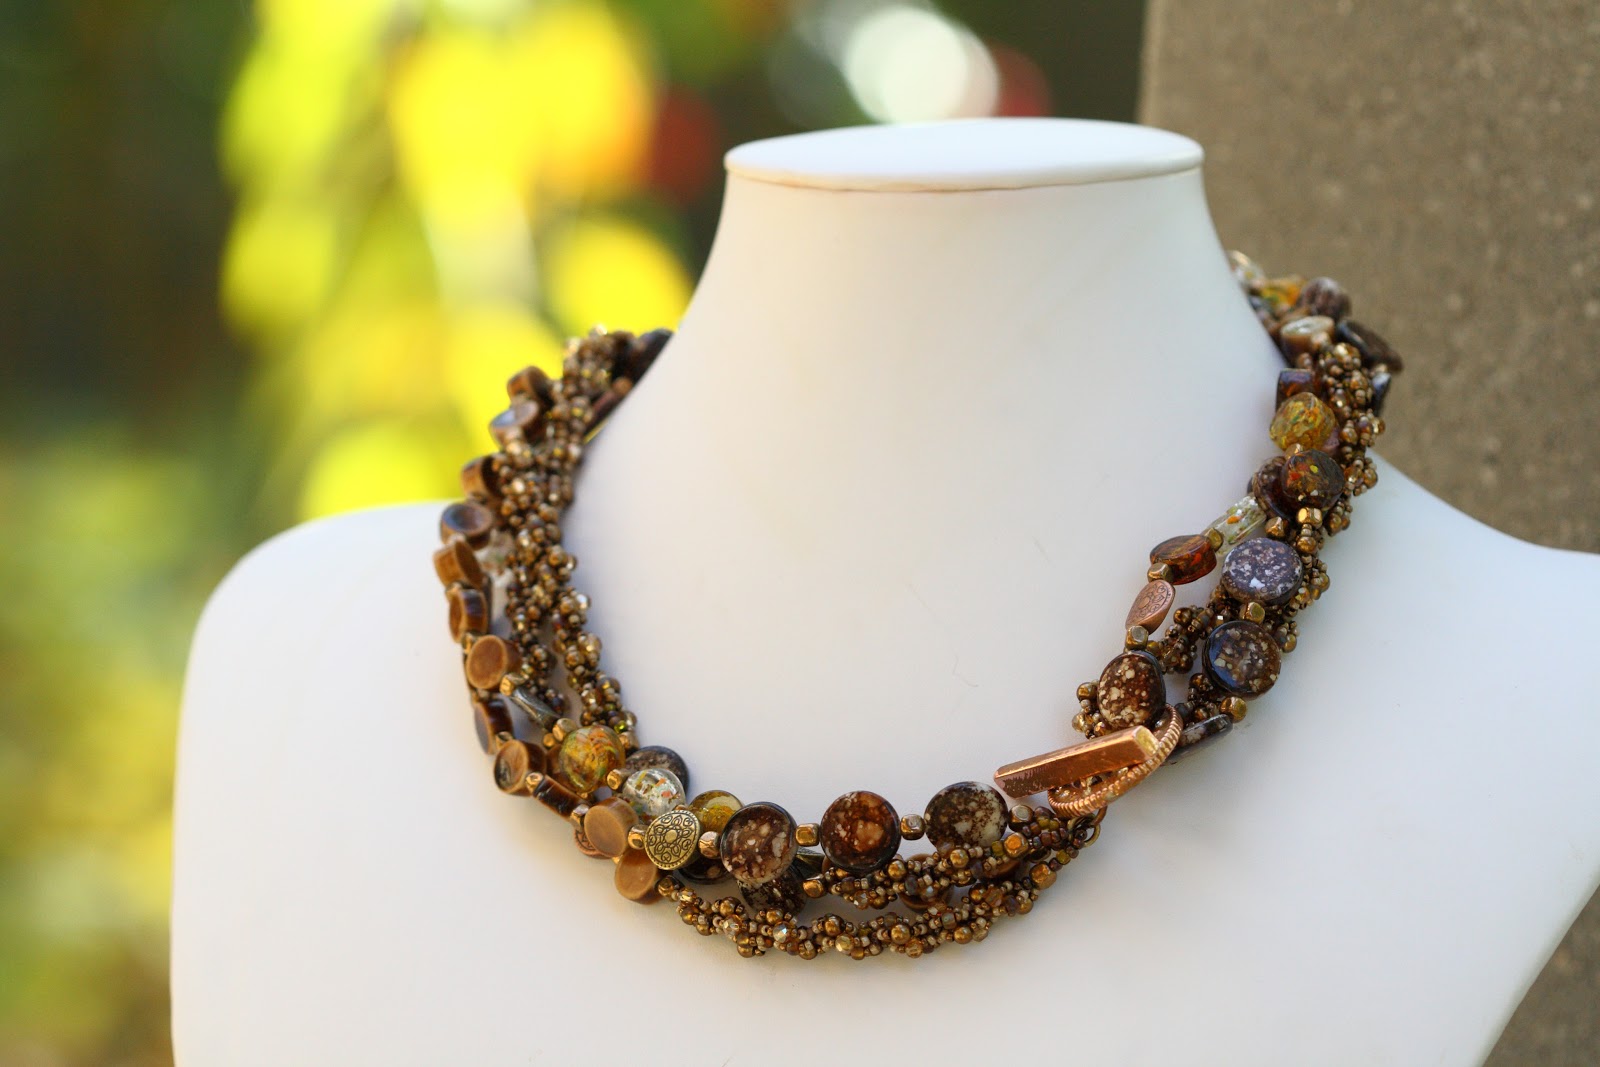
As luck would have it, I had a strand of bronze metal beads that worked perfectly with the beads Erin selected.  I started stringing .. and stringing .. and stringing.  Okay, it didn't take that long, but this necklace does take a ton of beads.


Two long (40 inch) strands of beads comprise Erin's necklace.  I was able to complete one strand using the beads Erin sent and even had a few left over.

I really wanted to incorporate bead weaving into this challenge.  Erin wanted to show how versatile her necklace pattern can be and I wanted to help her do that.

I looked through my stash and found a strand of 3mm bronze pearls.  A quick trip to the bead store yielded a strand of yellow/brown 3mm Chinese crystals.  What's a girl to do with those?  Make a spiral rope, of course.


I used the few beads I had left to break up sections of the spiral rope.

The spiral ropes compliment Erin's beads.


Erin was also kind enough to send a clasp.  It was a bit shiny for these beads, but a bit of gilder's paste helped toned it down.


I made my necklace a bit shorter than Erin's.  Even so, I was able to wear it twisted.


I think I prefer it hanging freely.  I love how you can adjust the strands to different lengths.


This necklace was so easy to make -- and fun also!  If you would like to make your own, you can find the instructions here on the Michaels website.

Erin, thank you for such a great design and a wonderful challenge.  I had a blast with these beads!

If you would like to see more awesome variations on the Toast of the Town necklace, please visit Erin's blog or take a look below:

Tanya - A Work In Progress - you are here
Pam - Re-Maker
Michelada - Micheladas Musings
Kay - Kayz Kreationz  (Note: Kay had to go out of town. Do check back for her reveal!)